LightBurn Software for CNC Lasers: Features, Compatibility and Setup

LightBurn is design, layout and machine-control software for supported laser cutters and engravers. It lets users create or import artwork, assign laser operations, preview the toolpath and send or save controller-compatible output from one workspace.
For CNC laser users, the most important compatibility factor is the machine controller. LightBurn communicates with the GCode, DSP or galvo controller rather than directly with an Opt Lasers laser head.
Check the controller first.
A compatible laser head does not automatically mean that LightBurn can communicate with the CNC. Identify the controller, firmware and required output method before purchasing a license.
What Is LightBurn Software?
LightBurn combines laser-oriented design tools, job preparation, preview and supported machine communication in one application.
| Function | What LightBurn does | Why it matters |
|---|---|---|
| Design and layout | Creates and edits vectors, text, shapes, offsets, arrays and project layouts. | Simple laser projects can be prepared without moving between several applications. |
| File import | Imports common vector and bitmap formats for cutting, line engraving, filled engraving and image processing. | Existing artwork can be prepared for a laser workflow without recreating it from scratch. |
| Cut layers | Assigns operation type, speed, power, passes, order and other output settings by layer. | Different parts of one design can use different engraving or cutting operations. |
| Image processing | Provides brightness, contrast, threshold, grayscale and dithering options for raster engraving. | Photographs and bitmap graphics can be prepared for the response of the material and laser. |
| Preview | Displays output order, travel movement, estimated time and the sequence of laser operations. | Users can identify duplicated paths, inefficient travel and unexpected output before processing. |
| Machine output | Communicates with supported controllers or saves controller-appropriate output for another sender. | The workflow can support direct operation or offline file transfer, depending on the CNC system. |
LightBurn is not a general-purpose router CAM application. It is designed around laser cutting, engraving and marking. For projects combining router machining and laser work, keep the router CAM and laser-processing stages clearly separated.
How LightBurn Works with a CNC Laser
LightBurn prepares the job and communicates with the motion controller, while the controller generates movement and laser-control signals.
1. Design
Create the artwork in LightBurn or import a compatible vector or bitmap file.
2. Laser operations
Assign line, fill or image settings and define the tested speed, output and pass count.
3. Controller output
LightBurn sends or saves commands formatted for the selected GCode, DSP or galvo device type.
4. Laser modulation
The CNC controller and interface convert the programmed commands into motion and a compatible laser-control signal.
LightBurn does not identify the optical laser head through the control cable. Compatibility depends on the CNC controller, connection method, firmware, device profile and interface used to control the laser.

LightBurn Core vs LightBurn Pro
Choose the LightBurn license from the controller family: Core supports GCode devices, while Pro also supports DSP and galvo devices.
| License | Supported device types | Published list price | Typical use |
|---|---|---|---|
| LightBurn Core | Supported GCode-based devices | $99 | Many GRBL-style diode laser machines and CNC laser upgrades. |
| LightBurn Pro | Supported GCode, DSP and galvo devices | $199 | DSP-controlled CO2 machines, supported galvo systems and mixed-controller environments. |
Both license types are perpetual and include three simultaneous computer seats and an initial year of software updates. Continuing to use an eligible installed release does not require an active update period. Review the LightBurn license comparison and current LightBurn pricing guide before purchase.
Opt Lasers sells the LightBurn Core license for compatible GCode-based CNC laser workflows. Confirm the controller type before ordering.
Get a LightBurn License together with our Laser Upgrades and save 10%
PLH3D-XT-50
Precision Engraving

- 6 W Optical Power
- Ultra HD 550 DPI – 45 μm Spot
- Max Wood Cutting (1 Pass): 3 mm (⅛")
- Best for fine engraving & intricate details
- Easy Plug & Play Kit with Manuals
PLH3D-XT8
High-Power Cutting & Engraving
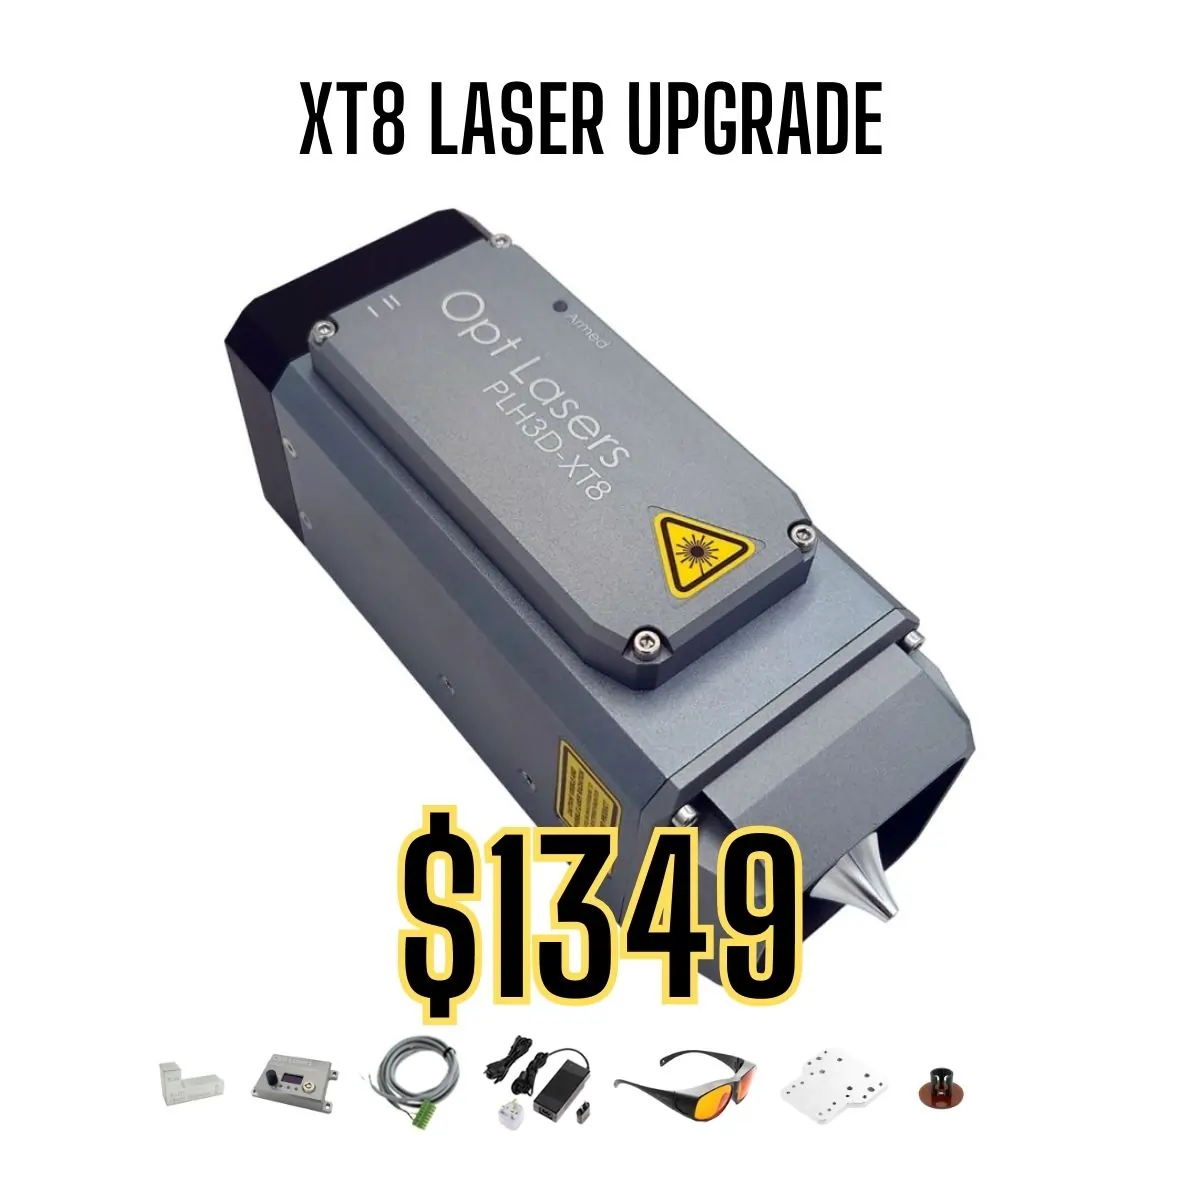
- 45 W Optical Power
- HD 125 DPI – 180 μm Spot
- Max Wood Cutting (1 Pass): 20 mm (¾")
- Best for high-speed engraving and deep cutting
- Engrave Wood with 350 mm/s (827 inch/min)
- Cut Plywood with 22.5 mm/s (53.1 inch/min)
- Easy Plug & Play Kit with Manuals
PLH3D-XF+
Entry-Level Solution

- 6 W Optical Power
- Standard 85 DPI – 300 μm Spot
- Max Multipass Wood Cutting: 3 mm (⅛")
- Perfect for hobby use and small creative projects
- Easy Plug & Play Kit with Manuals
Which Lasers and Controllers Work with LightBurn?
LightBurn supports documented GCode, DSP and galvo controller families, but compatibility must be confirmed for the exact controller and firmware.
| System type | Typical controller direction | License direction | What to verify |
|---|---|---|---|
| CNC router with a diode laser upgrade | Supported GCode firmware or a validated Custom GCode profile | Usually Core | Controller commands, connection, origin, work area, power scale and laser interface. |
| Desktop gantry laser | Supported GCode or DSP controller | Core or Pro | Exact board, firmware, homing behavior and manufacturer instructions. |
| CO2 laser with DSP controller | Supported DSP family | Pro | Controller model, network or USB connection and machine configuration. |
| Galvo marking system | Supported galvo controller or a documented special setup | Usually Pro | Control board, correction file, lens, source type and LightBurn support status. |
| Non-standard CNC controller | Offline output or a validated Custom GCode profile | Confirm before purchase | Required command format, power control, header, footer and method used to run the file. |
Use the LightBurn machine compatibility guide to identify the controller. For Opt Lasers hardware, see how LightBurn works with Plug&Play kits.
How to Use LightBurn: Basic Workflow
A reliable LightBurn workflow begins with the correct device profile and ends with a supervised test on verified material.
1. Add the device
Select the documented controller profile or create the machine manually with the correct work area and origin.
2. Prepare the design
Draw in LightBurn or import a file, then confirm scale, closed contours, duplicated paths and text geometry.
3. Assign cut layers
Separate cutting, line engraving, filled engraving and image operations into clearly identified layers.
4. Enter tested settings
Set the speed, output, passes, line interval and air-assist behavior for the exact material and machine.
5. Preview the job
Inspect processing order, travel moves, duplicated output and whether parts may move before later operations.
6. Set the origin
Match LightBurn’s start mode and job position to the real CNC coordinate system and material placement.
7. Frame safely
Check the job boundary with a safe framing method and confirm clearance across the complete path.
8. Test and supervise
Begin on suitable scrap material, monitor the complete process and stop if movement, smoke or flame is unexpected.
Continue with the complete LightBurn setup guide, the diode laser workflow and the LightBurn origin guide.
Files You Can Use in LightBurn
LightBurn works with common vector and bitmap formats, but the import result depends on the file structure and the intended laser operation.
Vector files
Vector formats are suited to line engraving, filled shapes and cutting paths. Before processing, check scale, open contours, duplicated lines, unsupported effects and whether fonts should be converted to curves.
Common workflows include SVG, DXF, AI and PDF, subject to the features and structure contained in the source file.
Bitmap images
Bitmap formats are used for photographs, logos and raster engraving. Prepare the physical size, resolution, contrast and dithering method for the material and required viewing distance.
Common image workflows include PNG, JPG, BMP, GIF and TIFF.
See the complete LightBurn file-format guide before transferring a production design.
Material Library and Laser Settings
LightBurn’s Material Library stores reusable layer settings, but it does not identify materials or guarantee that a saved preset is safe or correct.
What the library can store
- Operation type and layer settings.
- Speed and output values.
- Pass count and line interval.
- Notes and material-specific entries.
- Separate records for different machines or processes.
What the library cannot verify
- The exact material composition or coating.
- Whether the stock is safe to laser-process.
- Focus, optical condition or machine calibration.
- Air assist and extraction performance.
- Whether settings from another laser transfer safely.

Build the library from controlled tests on the exact material and machine. Use the LightBurn Material Library setup guide, the laser settings guide and the power scale test workflow.
Custom G-Code and Offline CNC Workflows
LightBurn can save G-code and provides a Custom GCode device type for advanced output customization, but the profile must be validated for the exact controller.
Standard GCode workflow
Use a built-in supported device type when the CNC firmware matches LightBurn’s documented controller profile. Check units, origin, S-value scale, laser mode and on/off behavior.
Custom GCode workflow
Advanced users can define command templates and output behavior for selected non-standard GCode systems. This does not make every CNC controller automatically compatible.
Review generated code before running it. Verify travel moves, laser enable and disable commands, power values, feed rates, Z-axis commands, program header and safe shutdown sequence.
Use the CNC laser G-code guide for command explanations and controller-specific safety checks.
LightBurn Setup and Learning Resources
Use the focused guide that matches the next task instead of changing several machine settings at once.
| Task | Recommended guide | Use it when |
|---|---|---|
| Download and installation | Download LightBurn software | You need the correct installer for Windows, macOS or a compatible legacy system. |
| Trial and activation | Start the trial or activate a license | You are testing LightBurn or entering a purchased license key. |
| Device profile | Use the Device Setup Wizard | You need to configure the controller, work area, connection and origin. |
| Coordinates and job position | Compare user origin and absolute coordinates | The preview is correct but the job starts in the wrong physical location. |
| Project organization | Understand LightBurn tool layers | You need construction geometry, framing objects or non-output reference layers. |
| Camera alignment | Configure a LightBurn camera | You want visual positioning and the installed camera is compatible. |
| Rotary engraving | Set up a rotary attachment | You are engraving suitable cylindrical objects. |
| Troubleshooting | Check common LightBurn setup mistakes | The machine connects but output, origin, scale or movement is incorrect. |
LightBurn with Opt Lasers CNC Upgrade Kits
LightBurn can support an Opt Lasers upgrade when the CNC controller and laser interface use a compatible, correctly configured workflow.
An Opt Lasers Plug&Play kit combines the selected laser head with machine-specific or universal integration components. LightBurn remains the software layer: it prepares the job and communicates with the CNC controller.
Before selecting software or hardware, confirm the CNC manufacturer, model, controller, available spindle-control output, working area, mounting method and required safety components.
What Can You Make with LightBurn?
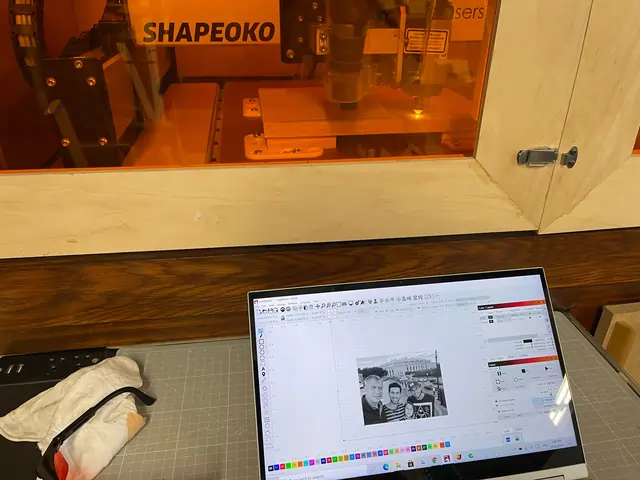
LightBurn supports projects ranging from one-off engraving to repeatable production, subject to the capabilities of the laser, machine and material.

Personalization
Names, logos, photographs, patterns and product identification on verified materials.

Vector cutting
Profiles, internal shapes, templates, packaging and layered assemblies from suitable sheet materials.

Prototyping
Models, fixtures, test parts, control panels and design iterations.

Signs and graphics
Text, labels, display graphics, architectural models and visual communication projects.
Browse LightBurn project examples or start with the free SVG files for CNC lasers.
LightBurn System Requirements and Downloads
Current LightBurn releases are intended for supported Windows and macOS systems; Linux is limited to the legacy 1.7 release branch.
Current systems
Use the current installer on a supported 64-bit Windows or macOS computer. Complex vector files and large images benefit from additional memory and a faster processor, but most basic laser projects do not require a workstation-class computer.
Legacy systems
Linux, Windows versions before 10 and older macOS versions require an appropriate legacy LightBurn release. Confirm controller support before relying on an older installation for production.
Follow the LightBurn download and installation guide. Mac users can also use the dedicated LightBurn for macOS guide.
LightBurn Software FAQ
These answers cover the main compatibility, licensing, setup and workflow questions.
What is LightBurn software?
LightBurn is design, layout and control software for supported laser cutters and engravers. It prepares artwork, assigns laser settings, previews the job and communicates with compatible GCode, DSP or galvo controllers.
How much does LightBurn cost?
The published list price is $99 for LightBurn Core and $199 for LightBurn Pro. Regional taxes and reseller pricing may affect the final amount. Check the current LightBurn pricing page before ordering.
Which LightBurn license do I need?
Choose Core for a supported GCode-based controller. Choose Pro when the machine requires supported DSP or galvo device support; Pro also supports GCode devices.
Does LightBurn work directly with an Opt Lasers laser head?
LightBurn communicates with the CNC controller, not directly with the optical laser head. The controller and adapter must produce a compatible laser-enable and power-control signal.
Can LightBurn work without a machine connected?
Yes. You can design, import files, configure layers, preview jobs and save supported machine output offline. The output still needs to be verified for the controller that will run it.
Does LightBurn support Linux?
Linux support is limited to the legacy LightBurn 1.7 release branch. Current releases require a supported Windows or macOS system.
Can LightBurn create custom G-code?
Yes. LightBurn can save G-code and provides a Custom GCode device type for advanced output customization. A custom profile must be built and tested for the exact controller and laser-control method.
Does LightBurn include ready-made material settings?
LightBurn provides a Material Library for storing and reusing settings. Saved entries are not universal presets and must be validated for the exact laser, material, focus, air assist and extraction setup.
Can I try LightBurn before buying?
Yes. LightBurn provides a fully functional 30-day trial for testing supported device types and workflows. Use the LightBurn free-trial guide to begin.
Is LightBurn a replacement for CNC router CAM software?
Not usually. LightBurn is designed for laser workflows. Router operations such as pocketing, V-carving and depth-based machining normally require dedicated CNC CAM software.
Where can I buy a genuine LightBurn license?
Opt Lasers sells a genuine LightBurn Core license for compatible GCode-based CNC laser systems. Use the product page to purchase the license or the LightBurn purchasing guide for more information.
Identify the controller and test the workflow before purchasing. Then configure the machine profile, verify the origin and create material settings from controlled tests.