Instructional Videos of Blue Laser Add-On for CNC Machines and 3D Printers

This page has been created to collect all video instructions that would be useful when setting up the laser head and installing the relevant updates, Find your CNC Machine. If you have connected a laser and the connection is not listed here, please email us and together we will create such an instructional video. If you have any further questions or ideas on how we can extend and improve this page, please contact us via the contact form.
Laser Upgrade Set-up
The manuals presents all the steps involved in assembling the Laser Upgrade PLH3D Series Kits.
-
Assembly of all components including accessories.
-
The connection to the Controller is shown with an explanation of plugging in the appropriate pins.
-
PLH3D Adapter allows the head to be safely turned off, and the key serves as an additional form of security.
-
Proper calibration allows you to get the most out of the PLH3D series.
How to Set the Working Distance for a Laser Head
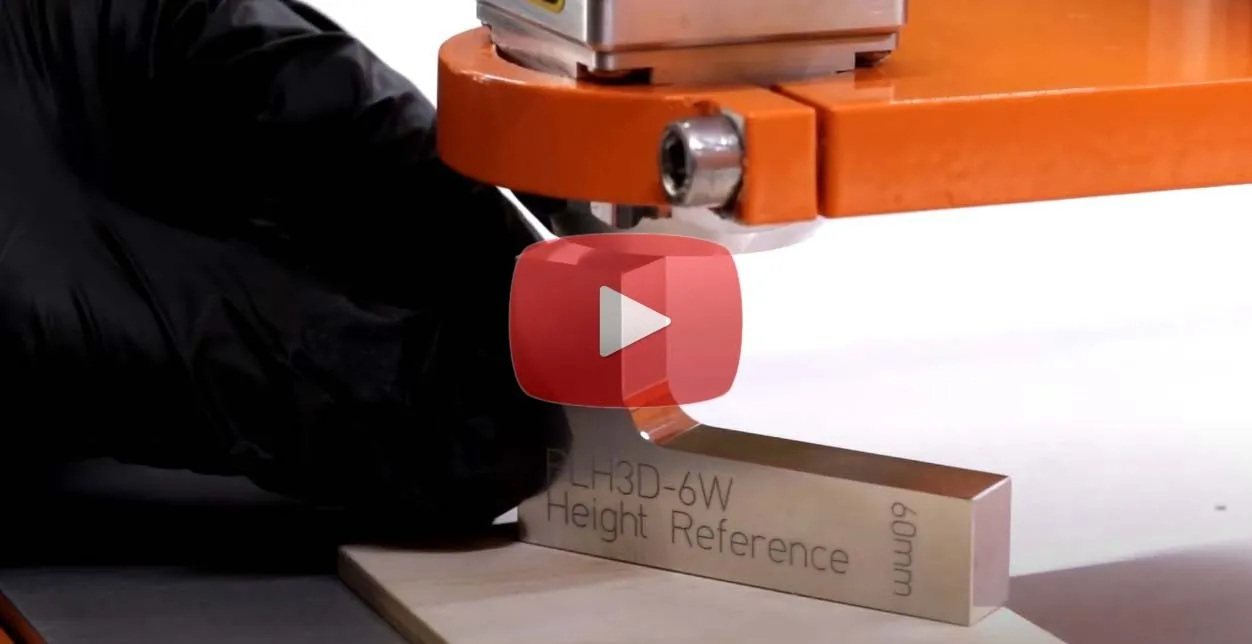
The right working distance setting allows you to get the best working result for both cutting and engraving materials. This is a very important part of preparing for laser work, in order to also get the expected beam spot.
Keep in mind that:
-
The working distance you should use depends on what you want to do with it
-
The laser head should be calibrated on a test scrap piece of material
-
If used for laser cutting, the laser head should ideally be calibrated for the smallest beam spot possible
-
If you use the laser head for laser engraving then you should go for the square-focused beam spot
-
You might also sometimes prefer to use the square beam spot for laser cutting if it's appropriate for the design, although the laser head will process your material of choice a bit slower.
How to Combine Lightburn with Duet 2 Controller
You also need software to work with laser heads. Curtis Wilson created the video below. He demonstrates how we can learn Lightburn software with the Duet 2 controller.
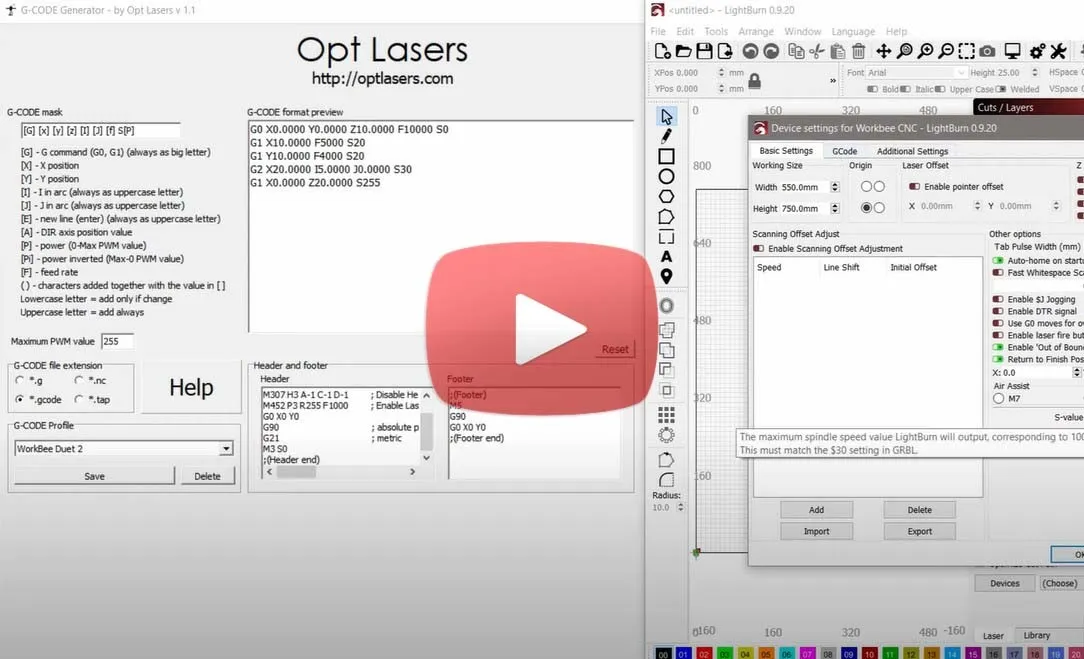
Lightburn is a CNC software for G-Code-based controllers such as Grbl, Smoothieware, Grbl-LPC, and Marlin.
The Lightburn CNC Software allows you to:
-
Import artwork in a wide range of familiar image formats (as well as vector graphic formats), including JPG, PNG, PDF, GIF, BMP, SVG, PLT, DXF, and AI
-
Adjust settings such as speed, power, number of passes, contrast, brightness, cut order, and application of a dithering mode among other options
-
Edit, refine, arrange, but also devise new vector shapes within the CNC software, with effective and powerful features such as boolean operations, offsetting, node editing, and welding
-
Send your idea straight to your cutting and engraving laser
-
This CNC software works on Windows Mac OS and Linux
-
You can purchase the software license on our website
Other CNC controllers
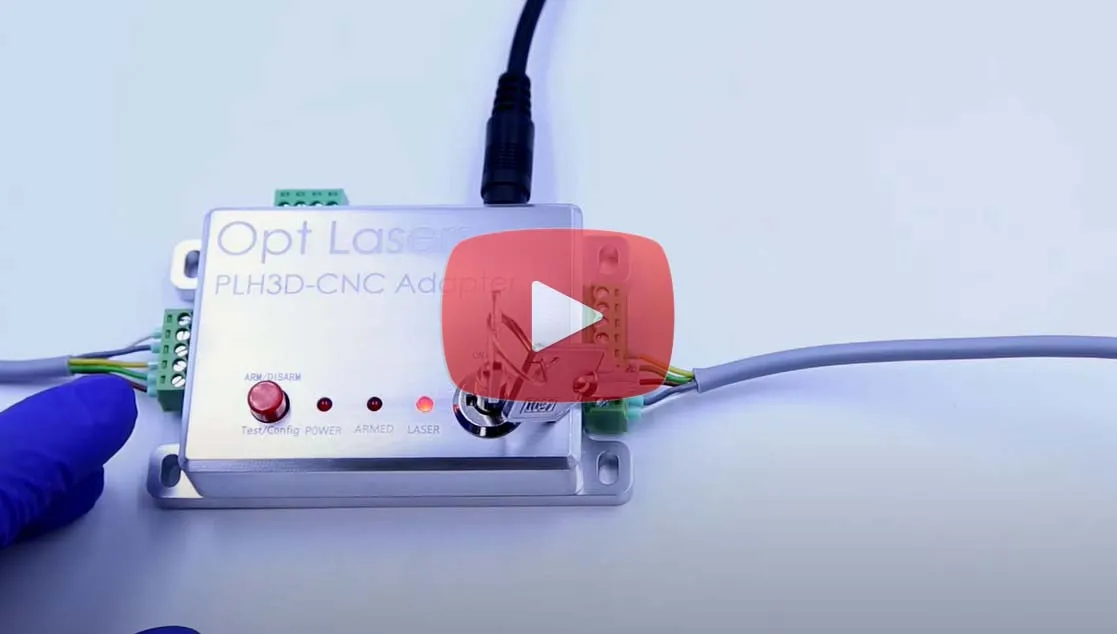
How to Connect PLH3D-CNC Adapter to any CNC Machine
The PLH3D-CNC Adapter serves as a versatile interface and safety unit connected in between a CNC machine and a high-performance PLH3D laser head.

Many types of CNC machines and 3D printers with different control voltage standards and levels available on the market may be used to control the PLH3D head. The PLH3D-CNC Adapter converts all these signals to the standard compatible with the PLH3D head. The general status (power, armed, laser working) may be checked at a glance by watching three LEDs.
-
The key function of the PLH3D-CNC Adapter is to “arm” and “disarm” the laser head
-
Arming means turning the head power supply on; the armed head is then able to generate a laser beam
-
Disarming (turning the head power supply off) brings the laser head to a safe state where generating a laser beam is fully impossible
-
The laser head may be checked by generating a short laser pulse at maximum power
-
Built-in safety means preventing misuse and unexpected behavior in an emergency. The key switch protects the laser head against arming by children and other unauthorized persons
How to check and Change PLH3D-CNC Adapter Settings For Your PLH3D-Series Laser Engravers
A special circuitry prevents arming at any malfunction of internal electronics. The laser head is automatically disarmed in case of emergency: loss of the mains supply, PSU failure, breaking or disconnecting the laser head cable. After disarming, the system remains in a safe state, and rearming always requires pressing the button by the user.
Key features of the PLH3D-CNC Adapter:
-
Soft Start
-
Indication LEDs - power, armed, laser working
-
Two external safety terminals (for example safety key, E-Stop)
-
One button system (arm, test, and setting of enabling modes)
-
Machined aluminum quality enclosure
-
Universal adapter allows connecting all types of signals used in CNC machines
Maintenance
How to Clean the Lens of Your Engraving Laser
In this short guide, we want to showcase to you how to clear your laser engraver lens. Before cleaning the lens, you must always remember to switch off and disconnect the laser head to prevent it from damage and for your safety.
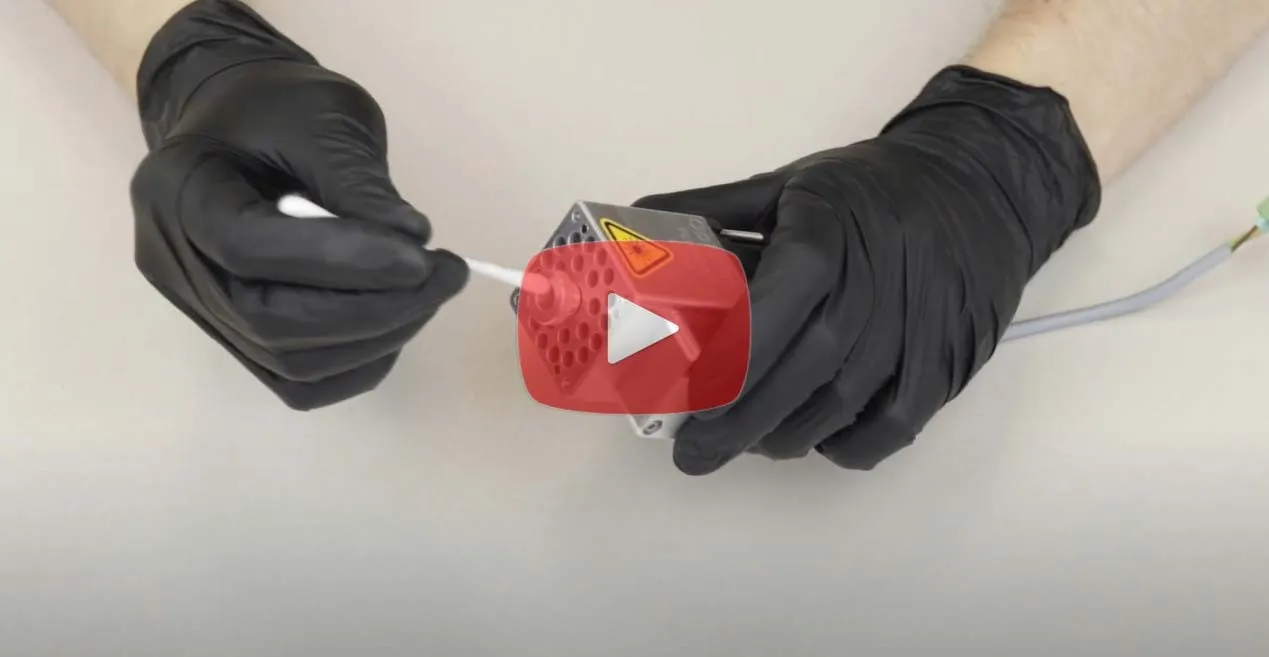
Maintenance of the laser lens is a vital part of the proper usage of the laser. To clean the dust on your lens use Isopropyl Alcohol (IPA) and dust-free wipes or cosmetic swabs.
Always Remember to:
-
Power Off the laser head and disconnect it before servicing!
-
Start the cleaning process fro using compressed air on the lens
-
Use Dust-Free wipes or cosmetic swabs
-
For better results repeat the process with cosmetic swabs
-
Ensure there is no dust left after cleaning the lens
-
At the end clean also the laser diode window with compressed air
How to Install Accessories
How to Install High-Pressure Air Assist Nozzle on Your Laser Head
This video guide shows how to install your High-Pressure Air Assist Nozzle on PLH3D-6W-XF+ cutting and engraving laser with and without the uSpot Lens Upgrade.
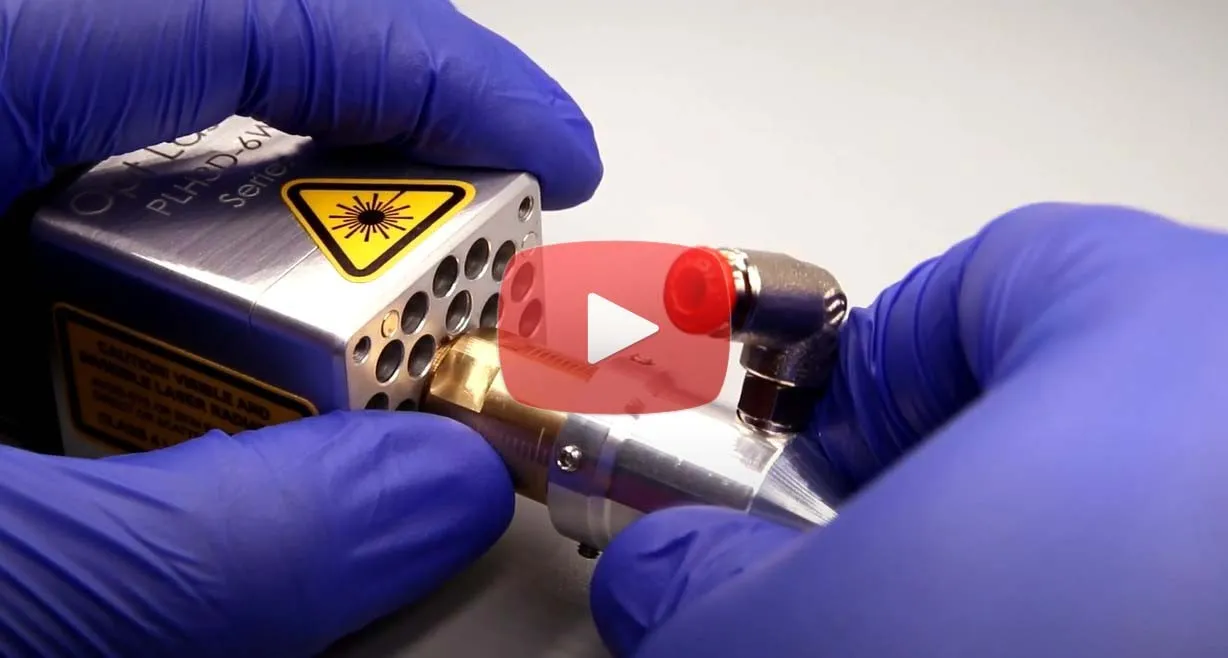
High-Pressure Air Assist Nozzle Kit contains everything you need to install the Air Nozzle on your XF+ laser head. The whole process is very simple, so follow the video tutorial to make sure everything goes smoothly. Get clean-Cut Edges by using the Air Assist Nozzle Kit.
With the High-Pressure Air Assist Nozzle Kit, you're assured of:
-
Compatibility With All Types of XF+ Laser Heads
-
Adjustable Nozzle Height
-
Light-Weight Aluminium Build
-
Distinctively Designed Outlet Contour
-
Convenient Air Hose Connector
-
High-Pressure Airflow
Versatile use of PLH3D laser heads for different applications
How to Cut Acrylic Plastics with Opt Lasers Cutting Laser Heads
Cutting and Engraving Acrylic with a laser is a very popular application for Opt Lasers Cutting and Engraving Laser Heads. Our laser heads can be used for laser processing both cast and extruded acrylic. This video demonstrates how to cut and engrave acrylic plastics with PLH3D-Series cutting and engraving lasers as well as offers a showcase of laser-processed acrylics.
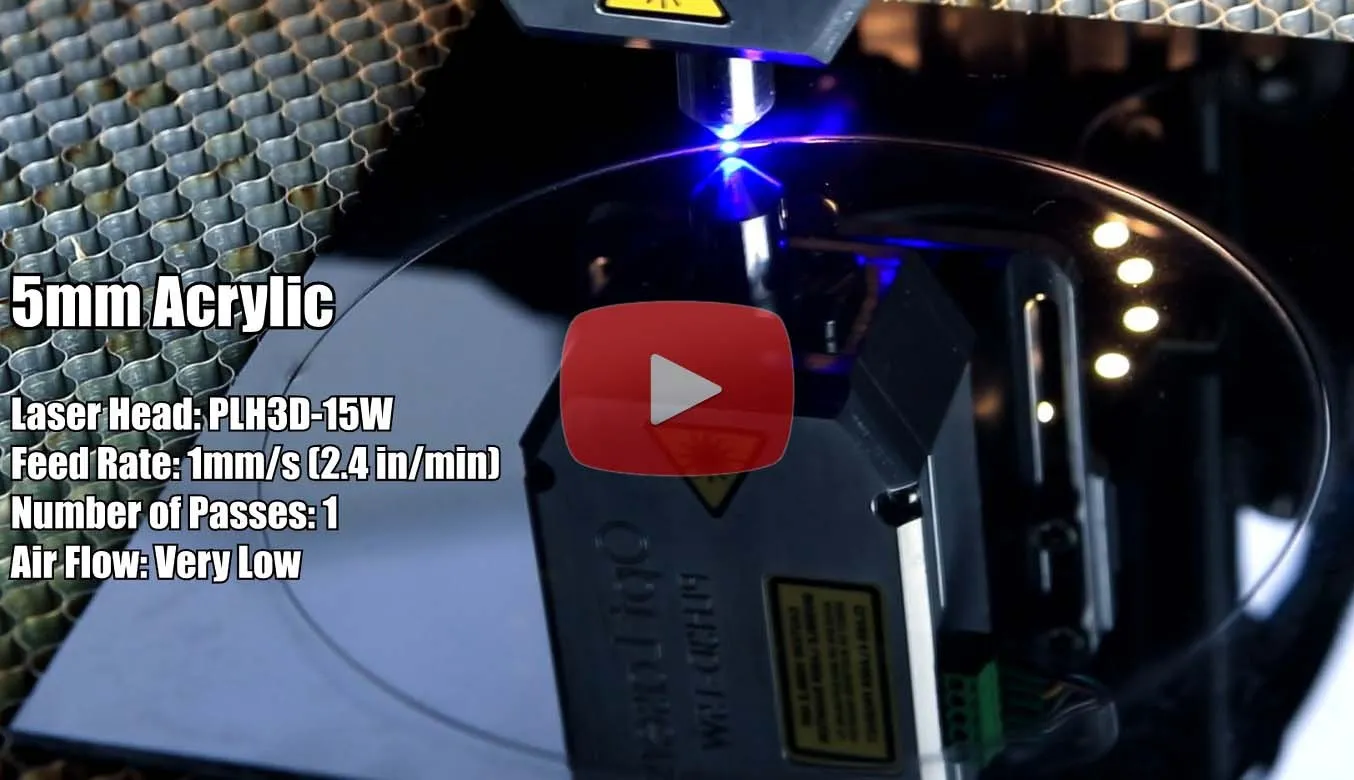
Our 15 W Opt Lasers Cutting and Engraving Laser Head will cut through up to one-fifth of an inch (5 mm) of acrylic at 5.9 inches per minute (2.5 mm/s). This is equivalent to laser cutting 96 feet (72 meters) of acrylic in 8 hours. What is more, similar to CO2 lasers, Opt Lasers blue cutting and engraving lasers produce flame-polished edges.
When looking to cut Acrylic you need to keep a few things in mind:
-
The ability to cut acrylic depends not only on its thickness but largely on its color. The lighter the color, and the higher the transparency, the more difficult it is to work with such material
-
The room must be ventilated, or a fume/air vent must be installed, as fumes from cutting plastic are harmful
-
Depending on the specification and quality of the cut, use different speed and air supply settings
-
Transparent acrylic is possible to engrave with the appropriate techniques, which you can read more about here