Ortur Laser Master 2 Upgrade - Using G-Code Generator
To cut or engrave, it is necessary to generate the appropriate G-code using the following commands:
|
M3 |
Laser ON |
|
M4 |
Laser ON - Dynamic Laser Power Mode (good for engraving pictures) |
|
M5 |
Laser OFF |
|
SXXX |
PWM duty where XXX is a number between 0 and 255 (e.g.: 0 = 0% and 255 = 100%) - depending on the software you use |
|
SXXXX |
PWM duty where XXXX is a number between 0 and 1000 (e.g.: 0 = 0% and 1000 = 100%) - depending on the software you use |
The first three commands should be placed at the beginning (header) of every generated G-code.
The fourth command should be placed at the end (footer) of the G-Code file. The “S” command has to be in the same line with every G1, to set the laser power. To see an example of G-code, please refer to Appendix 1.
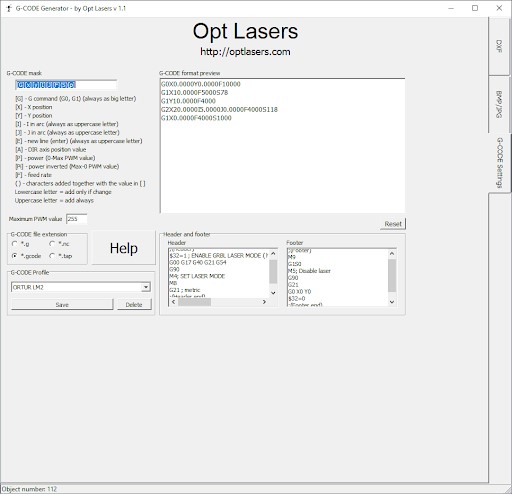
These are the appropriate settings from G-Code Generator for the ORTUR Laser Master 2 Profile:

To see an example of G-code, please refer to Appendix 1: G-Code Example.
